
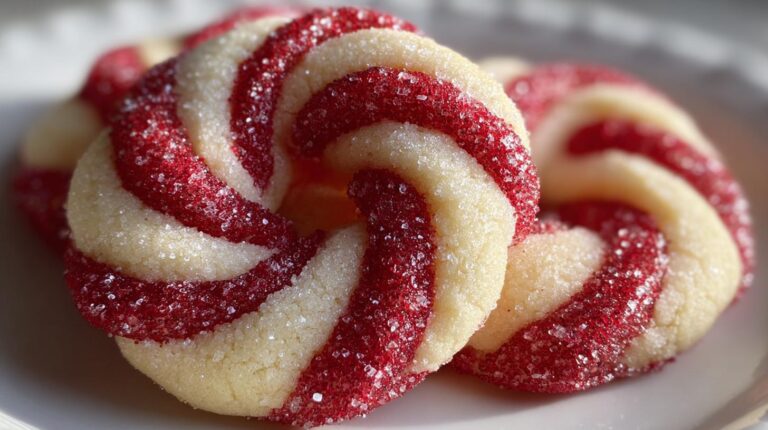
Nothing says “holidays” like the scent of peppermint and butter wafting through the kitchen. These peppermint twist cookies have been my go-to festive treat ever since my niece declared them “Christmas magic” after sneaking three off the cooling rack. The way the red and white dough swirls together just makes me happy – like edible candy cane cheer! I love how simple they are to make, yet they always steal the show on cookie trays. Trust me, once you see how these buttery, minty twists disappear at parties, you’ll understand why my family demands them every December. They’re the kind of recipe that turns kitchen chaos into sweet holiday memories.
Why You’ll Love These Peppermint Twist Cookies
These cookies aren’t just pretty—they’re downright addictive! Here’s why they’ve become my must-bake holiday tradition:
- Festive magic: That red-and-white swirl looks like Christmas exploded in cookie form. They’ll be the star of any holiday tray.
- Buttery bliss: The rich, melt-in-your-mouth texture makes you feel like you’re biting into a peppermint cloud.
- Easy-peasy: No fancy equipment needed—just your hands and a little patience for twisting the dough ropes.
- Gift goldmine: Stack them in cute boxes tied with ribbon, and suddenly you’re the most popular person at cookie exchanges.
Seriously, these disappear faster than holiday wrapping paper!
Ingredients for Peppermint Twist Cookies
Let’s talk ingredients – because these simple pantry staples come together to create pure holiday magic. I’ve learned over the years that quality matters here. Splurge on the real butter (none of that margarine nonsense!) and fresh peppermint extract for that authentic candy cane kick. Here’s everything you’ll need:
- 2 1/2 cups all-purpose flour – spoon and level it, don’t scoop!
- 1/2 tsp baking powder – the tiny lift that makes them perfect
- 1/4 tsp salt – balances the sweetness just right
- 1 cup unsalted butter, softened – leave it out for 30 minutes first
- 3/4 cup granulated sugar plus extra for rolling
- 1 large egg – room temperature blends better
- 1 tsp vanilla extract – the secret flavor booster
- 1/2 tsp peppermint extract – trust me, don’t skip this!
- Red gel food coloring – liquid makes dough too sticky
Pro tip: Measure your flour correctly – scoop it into your measuring cup with a spoon and level it off. Packed flour means dry cookies, and nobody wants that!
How to Make Peppermint Twist Cookies
Okay, let’s get our hands doughy! These peppermint twists come together like holiday magic, but I’ll walk you through each step so yours turn out perfect. The key is patience – don’t rush the chilling or twisting parts. Trust me, it’s worth the wait when you pull those gorgeous swirls out of the oven!
Mixing the Dough
First, whisk together your flour, baking powder, and salt in a bowl. In another bowl, beat the butter and sugar until it’s light and fluffy – about 2 minutes with a mixer. Add the egg, vanilla, and peppermint extract (careful, that peppermint is strong!). Now comes the fun part: slowly mix in the dry ingredients until just combined. Overmixing makes tough cookies, so stop when you see the last flour streaks disappear.
Divide the dough in half. Leave one half plain – that’s your white dough. For the red dough, add gel food coloring a few drops at a time until you get that perfect candy cane red. Wrap both dough balls in plastic and chill for 30 minutes. This makes the dough easier to handle and prevents spreading.
Shaping and Baking
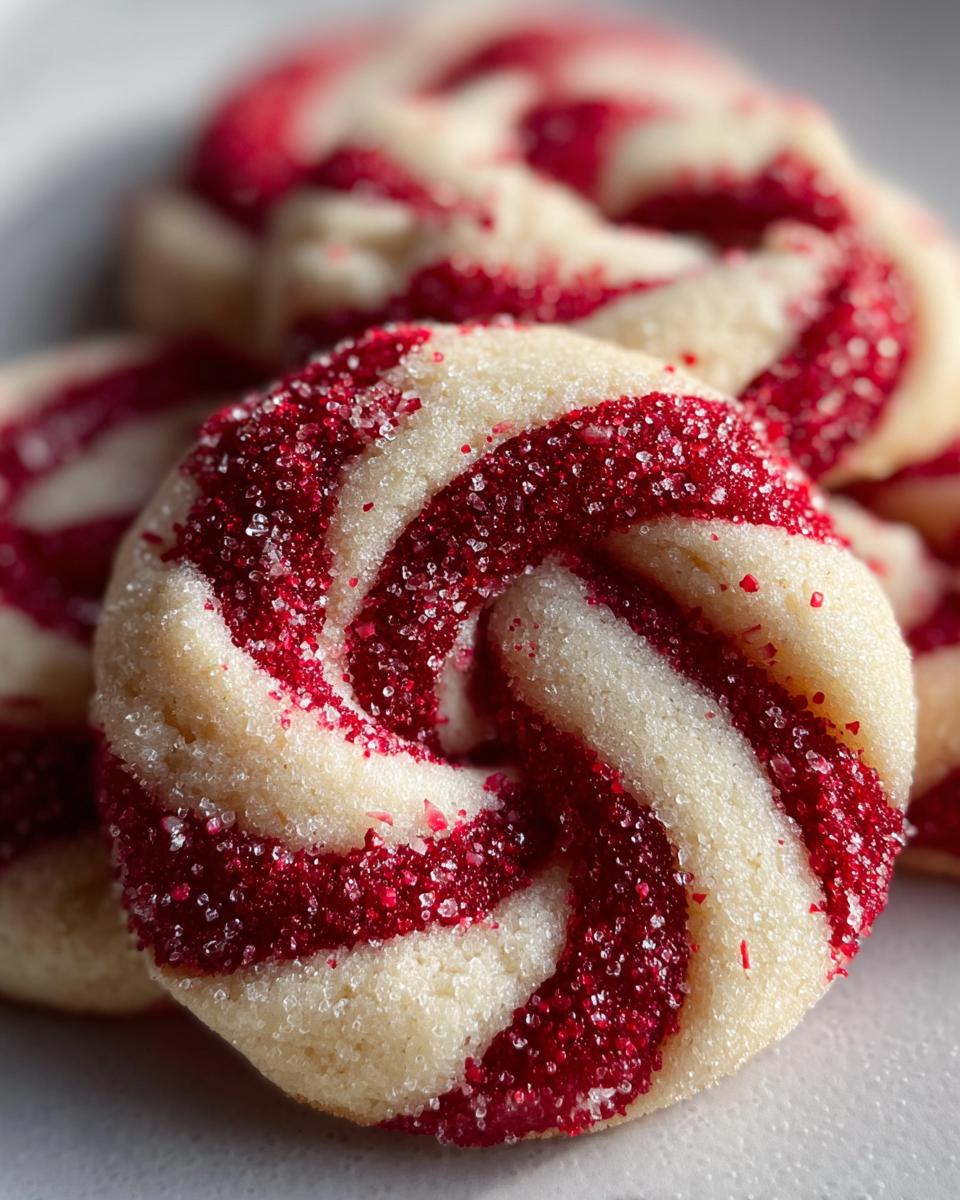
Preheat your oven to 350°F (175°C) and line baking sheets with parchment. Now for the twisty fun! Take tablespoon-sized pieces of each color dough and roll them into 5-inch ropes. Place a red and white rope side by side, then twist them together like a candy cane. Form into a circle and pinch the ends together – don’t worry if it’s not perfect, that’s part of the charm!
Roll each twisted circle in granulated sugar for extra sparkle. Bake for 10-12 minutes until the edges are just barely golden. They’ll still look soft in the center – that’s okay! Let them cool on the pan for 5 minutes before transferring to a rack. The hardest part? Waiting for them to cool before devouring!
Tips for Perfect Peppermint Twist Cookies
After making dozens (okay, hundreds) of these cookies over the years, I’ve picked up some tricks that make all the difference:
- Chill that dough! Warm dough spreads too much. If it gets sticky while twisting, pop it back in the fridge for 10 minutes.
- Gel food coloring only – liquid makes the dough weep and alters the texture. A little gel goes a long way!
- Twist gently – don’t overwork the dough ropes or the colors will muddy together.
- Store airtight with a slice of bread to keep them soft for days (the bread trick is my grandma’s secret!).
Follow these, and your cookies will look bakery-perfect every time!
Ingredient Substitutions & Variations
Got dietary needs or just want to mix things up? No problem! These peppermint twists are super flexible:
- Vegan version: Swap butter for vegan butter and use a flax egg (1 tbsp ground flax + 3 tbsp water). The texture stays surprisingly close!
- Different extracts: Not a peppermint fan? Try almond extract for a nutty twist or orange for citrusy holiday vibes.
- Natural coloring: Skip the food coloring entirely for pretty white twists, or use beet powder for a natural red hue.
- Gluten-free: Use 1:1 gluten-free flour blend – just add an extra tablespoon since GF flour absorbs more liquid.
My neighbor’s kids love when I make these with cinnamon instead of peppermint – they call them “Christmas morning cookies!”
Serving and Storing Peppermint Twist Cookies
Nothing beats curling up with a plate of these peppermint twists and a steaming mug of hot cocoa – the minty crunch against rich chocolate is pure holiday happiness! For cookie trays, I love stacking them in alternating directions to show off those pretty swirls.
Store leftovers (if you have any!) in an airtight container at room temperature for up to 5 days. Pro tip: tuck a slice of bread in the container to keep them soft. These freeze beautifully too – just layer between parchment paper in a freezer bag for up to 2 months. Thaw at room temperature when that peppermint craving hits!
Peppermint Twist Cookies FAQs
Over the years, I’ve gotten so many questions about these festive cookies – here are the answers to the ones I hear most often!
Can I use liquid food coloring instead of gel?
Oh honey, don’t do it! Liquid food coloring makes the dough sticky and can throw off the texture. Gel gives that vibrant red without adding extra moisture. Trust me – I learned this the hard way with a batch of pinkish-gray cookies!
How do I prevent my cookies from spreading too much?
Chill, chill, chill! Warm dough spreads like holiday gossip. If your kitchen’s warm, pop the shaped cookies in the fridge for 10 minutes before baking. Also, don’t skimp on the flour measurement!
Can I freeze the dough?
Absolutely! Wrap the dough balls tightly in plastic wrap, then freeze for up to 1 month. Thaw in the fridge overnight when you’re ready to bake. Perfect for last-minute cookie emergencies!
Why do my twists look muddy instead of striped?
You’re probably over-twisting! Gently twist just 2-3 times – any more and the colors start blending together. They should look like candy canes, not pink swirls!
Nutritional Information
Let’s be real – we’re not eating holiday cookies for their nutritional value! But since folks ask, here’s the scoop per cookie (based on making 24 from this recipe):
- Calories: 180
- Fat: 8g
- Sugar: 10g
- Carbs: 25g
Remember, these are estimates – your exact counts might vary based on cookie size and ingredients. I say enjoy them guilt-free – it’s Christmas!
Share Your Peppermint Twist Cookies
I’d love to see your holiday cookie creations! Snap a photo of your peppermint twists and tag me – nothing makes me happier than seeing your kitchen filled with that same peppermint magic. Leave a comment below if you’ve got any twists (pun intended!) on the recipe that your family loves. Happy baking, friends!
Print
Irresistible Peppermint Twist Cookies – Holiday Magic in 24 Bites
- Total Time: 1 hour
- Yield: 8 cookies 1x
- Diet: Vegetarian
Description
These peppermint twist cookies are a holiday baking favorite—perfect for cozy mornings, cookie trays, or gifting with a festive flair!
Ingredients
- 2 1/2 cups all-purpose flour
- 1/2 tsp baking powder
- 1/4 tsp salt
- 1 cup unsalted butter, softened
- 3/4 cup granulated sugar
- 1 large egg
- 1 tsp vanilla extract
- 1/2 tsp peppermint extract
- Red gel food coloring
- Extra granulated sugar (for rolling)
Instructions
- Whisk flour, baking powder, and salt in a medium bowl.
- Beat butter and sugar until light and fluffy.
- Add egg, vanilla, and peppermint extract. Divide dough, dye half red, and chill both for 30 minutes.
- Roll red and white dough into ropes, twist together, form circles, and roll in sugar.
- Bake at 350°F (175°C) for 10–12 minutes until edges are set.
Notes
- Chill dough for easier handling.
- Use gel food coloring for vibrant color.
- Store in an airtight container for freshness.
- Prep Time: 20 minutes
- Cook Time: 10 minutes
- Category: Dessert
- Method: Baking
- Cuisine: American
Nutrition
- Serving Size: 1 cookie
- Calories: 180
- Sugar: 10g
- Sodium: 50mg
- Fat: 8g
- Saturated Fat: 5g
- Unsaturated Fat: 2g
- Trans Fat: 0g
- Carbohydrates: 25g
- Fiber: 1g
- Protein: 2g
- Cholesterol: 30mg