
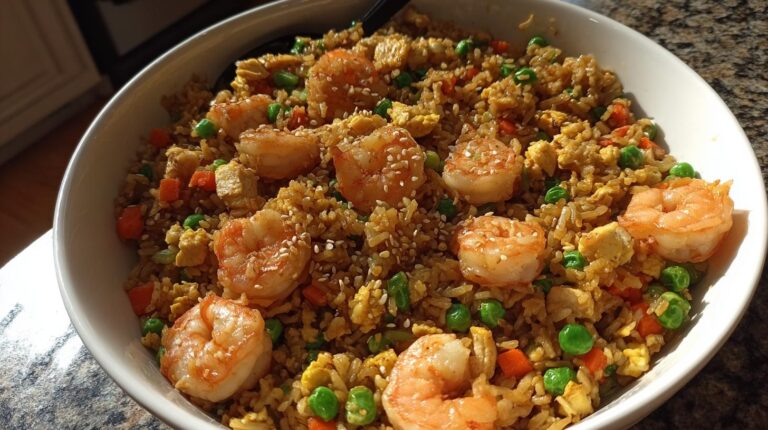
You know those nights when you’re staring into the fridge, wondering what to do with that half-empty takeout container of rice and some lonely shrimp in the freezer? That’s when I make my go-to shrimp fried rice—it’s faster than ordering delivery and tastes ten times better. I learned this trick from my college roommate, who’d whip it up after our late-night study sessions. The secret? That slightly dry, day-old rice soaks up all the savory goodness of soy sauce and sesame oil. Now it’s my family’s favorite way to turn leftovers into something magical in just one pan. Trust me, once you taste those crispy bits of rice with juicy shrimp, you’ll never look at takeout the same way again.
Why You’ll Love This Shrimp Fried Rice
This isn’t just any fried rice—it’s the kind of meal that makes you feel like a weeknight superhero. Here’s why it’s my forever favorite:
- Ready in 25 minutes flat (yes, really—faster than waiting for delivery!)
- One pan = less cleanup (my least favorite chore, solved)
- Uses up leftover rice (no more wasted takeout containers)
- Packed with flavor – that garlic-sesame-soy combo is *chef’s kiss*
- Customizable (got extra veggies? Toss ’em in!)
It’s the meal I make when I want something tasty without the fuss—and trust me, you’ll feel the same way.
Ingredients for Shrimp Fried Rice
Here’s the magic lineup for the best shrimp fried rice you’ll ever make at home. I’m pretty flexible with substitutions (we’ll get to those later), but these are my tried-and-true favorites:
- 4 cups cooked jasmine rice – must be cold and preferably day-old (fresh rice turns mushy)
- 1 lb large shrimp, peeled and deveined (I leave tails on for pretty presentation)
- 1 cup chicken breast, chopped into bite-sized pieces (thighs work too)
- 2 tbsp neutral oil – I use avocado, but canola or vegetable oil works
- 2 large eggs, beaten (farm-fresh if you can get them)
- 1 cup frozen peas & carrots – the lazy cook’s best friend
- 1/2 cup diced bell peppers – I love the color of red and yellow together
- 2-3 green onions, sliced (save the green tops for garnish)
- 3 cloves garlic, minced (more if you’re a garlic fiend like me)
- 1 tsp fresh ginger, minced (or 1/2 tsp ground ginger in a pinch)
- 1/4 cup low-sodium soy sauce – trust me, regular will make it too salty
- 1 tbsp oyster sauce (optional but adds amazing depth)
- 2 tsp toasted sesame oil – don’t skip this flavor bomb!
- 1/2 tsp black pepper (white pepper is more authentic if you have it)
See? Mostly pantry staples with a few fresh ingredients that make all the difference. Now let’s get cooking!
Equipment You’ll Need
This recipe keeps it simple—just grab these trusty tools from your kitchen:
- A large skillet or wok (mine’s 12 inches—perfect for tossing everything)
- A sturdy spatula (wooden or metal, whatever you flip pancakes with)
- A sharp knife (for quick chopping of those veggies and shrimp)
That’s it! No fancy gadgets needed—just good old-fashioned stir-fry action.
How to Make Shrimp Fried Rice
Alright, let’s dive into the fun part—turning these ingredients into golden, shrimp-studded perfection! I’ll walk you through each step with all my little tricks for getting that authentic takeout taste at home.
Step 1: Prep the Rice
Here’s where most people mess up—don’t skip this step! Grab your cold rice and break it apart with your fingers or a fork. You want those grains loose and separated, not in clumps. I like to do this right over the bowl so I can see any stubborn chunks that need extra attention. Trust me, this makes all the difference for that perfect fried rice texture.
Step 2: Cook the Proteins
Heat 1 tbsp oil in your skillet or wok over medium-high heat until it shimmers. Add the chicken pieces first—they take longer to cook. Stir them around for 4-5 minutes until they’re nicely browned and no longer pink inside. Scoop them onto a clean plate, then toss in the shrimp. These cook FAST—just 1-2 minutes per side until they curl up and turn pink. Don’t walk away or they’ll overcook! Remove them to join the chicken.
Step 3: Scramble the Eggs
Same pan, little drizzle of oil if needed. Pour in your beaten eggs and let them set for about 10 seconds before scrambling with your spatula. Cook just until they’re softly set—we’ll finish cooking them later. I like to push them to the side of the pan or remove them briefly if my pan’s crowded.
Step 4: Sauté Vegetables and Aromatics
Add the remaining oil and toss in your peas, carrots, and bell peppers. Stir-fry for 2-3 minutes until they’re bright and slightly tender but still crisp. Now the magic happens—add the white parts of your green onions, garlic, and ginger. The smell will make your stomach growl! Cook just 30 seconds until fragrant—any longer and the garlic burns.
Step 5: Combine and Finish
Here comes the grand finale! Add your prepped rice to the pan and stir-fry for 3-5 minutes, pressing down occasionally to get those delicious crispy bits. Pour in the soy sauce and oyster sauce, tossing until every grain is evenly coated and golden. Return all your cooked proteins and eggs to the pan. Drizzle with sesame oil, sprinkle with pepper, and give everything one last toss. Taste and adjust seasoning—I usually add another splash of soy sauce here. Garnish with those pretty green onion tops and serve immediately!
Tips for Perfect Shrimp Fried Rice
After making this recipe more times than I can count, here are my foolproof tricks for shrimp fried rice success:
- Cold rice is non-negotiable – Fresh rice steams instead of frying (I stash extra takeout rice in the freezer just for this!)
- High heat = better texture – That sizzle means you’re getting those crispy golden bits we all love
- Taste before adding salt – Between soy sauce and oyster sauce, you might not need extra
- Prep everything first – Once you start stir-frying, things move FAST (my “mise en place” saves many dinners)
- Don’t overcrowd the pan – Cook in batches if needed—your rice will thank you
Follow these, and you’ll have takeout-quality fried rice every single time!
Shrimp Fried Rice Variations
One of my favorite things about this recipe is how easily it adapts to whatever’s in your fridge! Here are my go-to twists when I’m feeling creative:
- Tofu instead of chicken – Extra-firm cubes work great for vegetarians
- Pork or beef strips – Thinly sliced leftovers add rich flavor
- Different veggies – Try broccoli florets, corn, or snap peas
- Spicy kick – A drizzle of sriracha or sprinkle of red pepper flakes
The possibilities are endless—that’s the beauty of fried rice!
Serving Suggestions
This shrimp fried rice is totally satisfying on its own, but here’s how I love to serve it for a full takeout-at-home experience:
- With crispy egg rolls (the frozen ones totally count!)
- Alongside a simple cucumber salad for freshness
- Topped with extra green onions and sesame seeds
Honestly? Sometimes I just grab a big spoon and eat it straight from the pan—no judgment here!
Storing and Reheating Shrimp Fried Rice
Here’s the good news – this shrimp fried rice tastes almost as amazing the next day! Just store it in an airtight container in the fridge for up to 3 days. When reheating, skip the microwave (which makes rice soggy) and toss it back in a hot skillet with a splash of water or oil. Stir-fry for 2-3 minutes until steaming hot all the way through – this keeps those crispy bits intact. Safety tip: If you’re reheating seafood, make sure it reaches 165°F and eat within 2 days for best quality.
Shrimp Fried Rice Nutrition
Here’s the scoop on what you’re getting in each delicious serving of this shrimp fried rice (based on my exact ingredients):
- 520 calories – Perfectly balanced for a satisfying meal
- 36g protein – Thanks to all that shrimp and chicken!
- 55g carbs – Mostly from the rice (great post-workout fuel)
- 18g fat – The good kind from eggs and sesame oil
Remember—nutrition varies by ingredients. Using less oil or swapping veggies will change these numbers. But honestly? When something tastes this good, I’m not counting too closely!
Frequently Asked Questions
I get asked about this shrimp fried rice recipe all the time—here are the questions that pop up most often in my kitchen (and my honest answers!):
Can I use fresh rice if I don’t have leftovers?
You can, but it won’t be the same—fresh rice steams instead of frying and turns mushy. If you’re desperate, spread freshly cooked rice on a baking sheet and pop it in the fridge for 30 minutes to dry out slightly. But honestly? Leftover takeout rice works best!
What’s a good substitute for oyster sauce?
No worries if you don’t have it! Try 1 tsp hoisin sauce + 1/2 tsp Worcestershire sauce, or just double the soy sauce. The oyster sauce adds depth, but your fried rice will still taste amazing without it.
How do I prevent the shrimp from overcooking?
Watch them like a hawk! Shrimp cook in just 1-2 minutes—they’re done when they curl into a “C” shape. Remove them immediately, even if you think they need “just 10 more seconds.” They’ll finish cooking when you toss everything together.
Can I make this vegetarian?
Absolutely! Skip the shrimp and chicken, add extra firm tofu or scrambled eggs, and use vegetarian oyster sauce (or my substitution above). It’s still packed with protein and flavor.
Why does my fried rice stick to the pan?
Two likely culprits: not enough oil or heat too low. Make sure your pan is properly heated before adding ingredients, and don’t skimp on that initial oil drizzle. A well-seasoned wok or non-stick skillet helps too!
Rate This Recipe
Did this shrimp fried rice hit the spot for you? Drop a quick rating below—I’d love to hear how it turned out in your kitchen!
Print
25-Minute Shrimp Fried Rice That Beats Takeout Every Time
- Total Time: 25 minutes
- Yield: 4 servings 1x
- Diet: Low Lactose
Description
A quick and flavorful shrimp fried rice recipe that combines shrimp, chicken, and vegetables with day-old rice for the perfect texture.
Ingredients
- 4 cups cooked jasmine rice (cold, day-old works best)
- 1 lb large shrimp, peeled and deveined
- 1 cup chicken breast, bite-size pieces
- 2 tbsp neutral oil (avocado, canola, or vegetable), divided
- 2 large eggs, beaten
- 1 cup frozen peas & carrots (or mixed veggies)
- 1/2 cup diced bell peppers (red/yellow)
- 2–3 green onions, sliced (white + green parts)
- 3 cloves garlic, minced
- 1 tsp fresh ginger, minced (or 1/2 tsp ground ginger)
- 1/4 cup low-sodium soy sauce
- 1 tbsp oyster sauce (optional but great)
- 2 tsp toasted sesame oil
- 1/2 tsp black pepper (or white pepper)
- Salt, to taste (go easy—soy sauce is salty)
Instructions
- Prep the rice: Break up cold rice with your hands or a fork so it’s loose and not clumpy.
- Cook the chicken: Heat 1 tbsp oil in a large skillet or wok over medium-high heat. Add chicken and cook 4–5 minutes until browned and cooked through. Remove to a plate.
- Cook the shrimp: In the same pan, add shrimp and cook 1–2 minutes per side until pink and just cooked. Remove to the plate with the chicken.
- Scramble the eggs: Add a small drizzle of oil if needed. Pour in eggs and scramble until just set. Push to the side or remove briefly.
- Sauté veggies + aromatics: Add remaining 1 tbsp oil. Stir in peas/carrots, bell peppers, and the white parts of green onions. Cook 2–3 minutes. Add garlic and ginger; cook 30 seconds.
- Fry the rice: Add rice to the skillet. Stir-fry 3–5 minutes, pressing and tossing until hot and slightly toasted.
- Sauce it: Pour in soy sauce and oyster sauce. Toss well so the rice turns evenly golden-brown.
- Finish: Return chicken, shrimp, and eggs to the pan. Drizzle sesame oil, add pepper, and toss 1–2 minutes. Taste and adjust seasoning. Top with green onion greens and serve.
Notes
- Use cold, day-old rice for best texture.
- Adjust soy sauce carefully to avoid over-salting.
- Oyster sauce adds depth but can be omitted.
- Prep Time: 10 minutes
- Cook Time: 15 minutes
- Category: Main Dish
- Method: Stir-fry
- Cuisine: Asian
Nutrition
- Serving Size: 1 serving
- Calories: 520
- Sugar: 3g
- Sodium: 800mg
- Fat: 18g
- Saturated Fat: 3g
- Unsaturated Fat: 12g
- Trans Fat: 0g
- Carbohydrates: 55g
- Fiber: 3g
- Protein: 36g
- Cholesterol: 250mg