
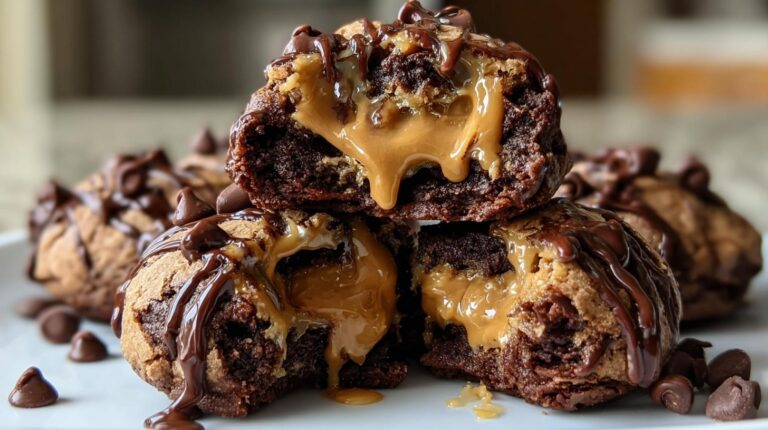
You know those desserts that disappear before you even finish saying “dig in”? That’s exactly what happens every time I make these Chocolate Chip Brownie Bombs. I swear, they’re like little bites of magic – fudgy brownie hugs a surprise pocket of melty peanut butter or chocolate, all dressed up in a glossy chocolate drizzle. My friends now demand them at every gathering, and honestly? I don’t blame them one bit.
I first stumbled upon this recipe when I needed a last-minute treat for book club. Twenty minutes of frantic mixing later, these bombs became my signature move. There’s something about breaking through that chocolate shell to find the gooey center that makes people’s eyes light up. Trust me, once you try them, you’ll understand why my cookie jar is always empty!
Why You’ll Love These Chocolate Chip Brownie Bombs
Listen, I don’t just bake these because they’re delicious (though oh boy, are they ever). Here’s why these little bombs will become your new obsession:
- Five-minute magic: Starts with a box mix – no fancy skills needed!
- That *crack*: Breaking through the chocolate shell to find the gooey center never gets old
- Party superhero: One batch disappears faster than you can say “chocolate emergency”
- Customizable joy: Peanut butter today, Nutella tomorrow – it’s your chocolate playground
Seriously, these are the treats that’ll have people begging you for the recipe while still chewing. Don’t say I didn’t warn you!
Ingredients for Chocolate Chip Brownie Bombs
Here’s everything you’ll need to create these little pockets of joy. I keep it simple because, honestly, who has time for complicated ingredient lists when chocolate cravings strike?
- 1 box (18-20 oz) brownie mix – Use your favorite brand, but go for the fudgy-style mix if you have options
- Ingredients listed on the box – Usually eggs, oil, and water (I always grab an extra egg just in case!)
- ½ cup creamy peanut butter OR chocolate spread – Room temperature so it’s easy to work with
- ½ cup chocolate chips – I use semi-sweet, but milk chocolate works great too
- 1 cup milk chocolate chips – For that gorgeous drizzle coating
- 1 tablespoon coconut oil OR butter – Makes the chocolate perfectly smooth for dipping
- Extra chocolate chips (optional) – For sprinkling on top because more chocolate is never wrong
Pro tip: If you’re using homemade brownies (you overachiever, you!), you’ll need about 3 cups of crumbled brownie pieces. Just bake your favorite recipe until it’s *almost* done – we want that fudgy center!
Equipment You’ll Need
Now, I’m not one for fancy gadgets – my grandma baked miracles with just a wooden spoon and some elbow grease. But these few tools will make your brownie bomb adventure way easier:
- Mixing bowl – Any decent-sized bowl will do (I’ve used a cleaned-out salad bowl in a pinch!)
- 8×8 inch baking pan – For that perfect brownie thickness
- Cookie scoop (1-1.5 tbsp size) – Lifesaver for evenly sized bombs (though a spoon works too)
- Microwave-safe bowl – For melting chocolate without drama
- Parchment paper – Saves so much cleanup time
- Fork or toothpicks – For dipping and drizzling like a chocolate artist
That’s it! No stand mixers or fancy piping bags needed here. Though if you do have a silicone spatula, it’ll help scrape every last bit of that brownie batter into the pan. Waste not, want not!
How to Make Chocolate Chip Brownie Bombs
Okay, let’s get to the fun part – making these little chocolate miracles! I promise it’s easier than you think. Just follow these steps, and you’ll be biting into pure bliss before you know it.
Step 1: Prepare the Brownie Base
First things first – let’s make that fudgy brownie foundation. Preheat your oven to whatever temperature your box mix recommends (usually 350°F). Line your baking pan with parchment paper – trust me, this saves so much hassle later.
Mix up your brownie batter according to the package directions, but here’s my secret: bake them for about 5 minutes less than the minimum time listed. We want them just set enough to handle but still super moist inside. You’ll know they’re ready when the edges look baked but the center still jiggles slightly when you nudge the pan.
Let them cool completely in the pan – I know it’s tempting to rush this part, but warm brownies crumble everywhere. Learned that the hard way!
Step 2: Stuff and Shape the Bombs
Time for the magic filling! Crumble your cooled brownies into a bowl – don’t be shy about using your hands here. Grab about a tablespoon of crumbs and flatten it in your palm. Now for the surprise center: drop about ½ teaspoon of peanut butter (or chocolate spread) and a few chocolate chips in the middle.
Gently fold the brownie around the filling, rolling between your palms to form a nice round ball. If it sticks, dampen your hands slightly – works like a charm! Pro tip: make them slightly smaller than you think – they’re richer than they look. Repeat until all your brownies are transformed into little flavor bombs.
Pop them in the freezer for about 15 minutes – this makes the next step way easier. (Confession: I’ve eaten them like this and they’re still amazing!)
Step 3: Drizzle with Chocolate
Now for the fancy finish! Melt your milk chocolate chips with the coconut oil in 30-second bursts in the microwave, stirring between each. It should be smooth and glossy – if it’s too thick, add just a smidge more oil.
Here comes the fun part: using a fork or toothpick, dip each bomb into the chocolate, letting the excess drip off. Place them on parchment paper and immediately sprinkle with extra chips if you’re feeling fancy. The chocolate sets pretty quickly, especially if your bombs are chilled.
Let them sit until the chocolate firms up – about 20 minutes at room temp, or 10 in the fridge if you’re impatient like me. Then comes the best part – that first bite where chocolate cracks to reveal the gooey center. Pure happiness!
Tips for Perfect Chocolate Chip Brownie Bombs
After making more brownie bombs than I can count (and taste-testing every single one, obviously), I’ve picked up some tricks that’ll take yours from good to “oh-my-goodness-what-is-this-sorcery” levels. Here’s what I’ve learned the hard way so you don’t have to!
Getting the texture just right
That perfect fudgy-but-not-messy texture starts with the brownie base. Underbake them slightly – we’re talking about 5 minutes less than the box says. When you pull them out, the center should look slightly underdone (a toothpick will have moist crumbs, not clean). They’ll finish setting as they cool, giving you that dreamy, dense-but-not-dry texture.
Working with sticky situations
Sticky hands making shaping impossible? Lightly dampen your palms with water or rub a tiny bit of oil on them between rolling. The bombs will glide right into perfect spheres without sticking. If your filling is oozing out, you might be using too much – just a half-teaspoon does the trick!
The chocolate coating secret
For that smooth, crackable chocolate shell, make sure your bombs are chilled before dipping. Room temp bombs make the chocolate seize up. And here’s my favorite hack: if your chocolate starts thickening as you work, just pop the bowl back in the microwave for 10 seconds to bring it back to perfect dipping consistency.
Storage smarts
These keep beautifully in an airtight container at room temp for 2 days, or in the fridge for up to 5 days (if they last that long!). Layer them between parchment paper so they don’t stick together. Want to freeze them? Do it before the chocolate coating – then just dip when ready to serve!
Variations for Chocolate Chip Brownie Bombs
Oh, the possibilities! Once you’ve mastered the basic brownie bomb, it’s time to play. Here are my favorite ways to mix things up – because who says you can’t improve on perfection?
Switch up the filling
That peanut butter center is divine, but don’t stop there! Try these delicious alternatives:
- Nutella: Because chocolate deserves more chocolate
- Cookie butter: For that speculoos spice kick
- Marshmallow fluff: Creates a s’mores-like surprise
- Caramel sauce: Just a tiny drop for gooey goodness
Add some crunch
Texture lovers, this one’s for you. Before rolling your bombs, mix in:
- Crushed pretzels (sweet & salty magic)
- Chopped nuts (pecans are my favorite)
- Crushed Oreos (because why not?)
- Toffee bits (for that buttery crunch)
Get creative with coatings
The chocolate drizzle is classic, but let’s get wild:
- White chocolate with sprinkles (instant party vibes)
- Dark chocolate with sea salt (elevated sophistication)
- Crushed freeze-dried strawberries (pink & pretty)
- Shredded coconut (tropical twist)
My latest obsession? Rolling half in chocolate and half in crushed peanuts for a “peanut butter cup” effect. The best part? No wrong answers here – just delicious experiments waiting to happen!
Serving and Storing Chocolate Chip Brownie Bombs
Okay, let’s talk about the best part – eating these little chocolate wonders! I’ve found they’re most magical at room temperature, when the chocolate shell gives that satisfying *snap* and the filling is just soft enough to ooze slightly. But honestly? They’re delicious any way you serve them – straight from the fridge for a firmer bite or slightly warmed for extra gooeyness.
For parties, I arrange them on a platter with mini parchment paper squares – looks fancy but takes two seconds. Pro tip: If you’re serving them chilled, take them out about 10 minutes before your guests arrive. That sweet spot where the chocolate loses its chill but the center stays cool? Perfection.
Keeping your bombs fresh
Now, let’s be real – these rarely last long enough to need storing. But if you somehow end up with leftovers (who are you and can we be friends?), here’s how to keep them tasting amazing:
- Airtight is right: Tuck them in a container with a tight lid – I use my trusty cookie tin lined with parchment
- Layer carefully: Stack them with parchment between layers so they don’t stick together
- Room temp: They’ll stay perfect for 2-3 days on the counter (if hidden from sneaky family members)
- Fridge life: Up to 5 days chilled, though the texture firms up a bit
One warning – the chocolate might develop a slight “bloom” (those white streaks) after a day or two. Totally normal and still delicious! Just means the cocoa butter separated a bit. If it bothers you, a quick 5-second microwave zap will make them shiny again.
Freezing for future cravings
Here’s my secret weapon: freeze the uncoated bombs on a tray until solid, then store in a freezer bag. When chocolate emergencies strike (we all have them), just dip in melted chocolate and voila – instant fresh treats! They’ll keep for up to 2 months this way. Though in my house? They never last that long.
Nutritional Information
Okay, let’s be real – we’re not eating brownie bombs for their health benefits. But if you’re curious (or need to justify eating three in one sitting), here’s the scoop on what’s in these little chocolate wonders:
- Serving Size: 1 bomb (about 1.5 oz)
- Calories: 320 (worth every single one!)
- Sugar: 25g (it’s basically happiness in gram form)
- Fat: 18g (9g unsaturated, 7g saturated)
- Carbohydrates: 35g (2g fiber)
- Protein: 5g (surprising, right?)
- Sodium: 150mg
- Cholesterol: 30mg
Now, here’s my disclaimer: these numbers can change depending on your ingredients. Using dark chocolate instead of milk? Different peanut butter brand? Homemade brownies? All those little swaps affect the final count. The estimates above are based on standard box mix and store-brand ingredients.
My philosophy? Enjoy every bite mindfully (or don’t – I won’t judge!). These are treats meant to be savored, not stressed over. Though if you’re watching specific dietary needs, feel free to tweak the recipe – sugar-free chocolate chips work great, and there are amazing gluten-free brownie mixes out there too!
Frequently Asked Questions
Q: Can I use homemade brownies instead of box mix?
Absolutely! You’ll need about 3 cups of crumbled brownies. Just bake your favorite recipe until it’s almost done – we want them fudgy, not cakey. My grandma’s secret? Pull them when a toothpick comes out with moist crumbs rather than clean. The texture works perfectly for shaping into bombs.
Q: How do I keep the chocolate coating from cracking?
Two tricks: 1) Make sure your bombs are thoroughly chilled before dipping (15 minutes in freezer does wonders), and 2) Add that tablespoon of coconut oil to your melting chocolate. It keeps the coating flexible. If cracks still happen? Call them “artisan texture” and eat them anyway!
Q: Can I make these ahead for a party?
You bet! Assemble the uncoated bombs and freeze them up to a month ahead. Day-of, just melt your chocolate and dip – they’ll taste freshly made. Stored properly at room temp, the finished bombs stay perfect for 2 days. Pro tip: Hide them from snackers with a “Do Not Touch” sign that may or may not work.
Q: Help! My peanut butter filling keeps oozing out!
First, make sure you’re using thick, room-temp peanut butter (natural brands tend to be runnier). Second, use just ½ teaspoon per bomb – it expands when rolled. Last resort? Mix your PB with a tablespoon of powdered sugar to thicken it. Works like a charm!
Q: Any nut-free alternatives to peanut butter?
So many options! Sunflower seed butter works great, or go for chocolate spreads like Nutella. Marshmallow fluff makes a fun s’mores version, or try a dollop of thick caramel sauce for a turtle candy effect. Get creative!
Now get baking! I want to hear all about your brownie bomb adventures. Tag me with your creations – especially the messy ones. Those always taste best anyway!
Print
Irresistible Chocolate Chip Brownie Bombs with 3 Surprise Fillings
- Total Time: 45 minutes
- Yield: 10–12 bombs 1x
- Diet: Vegetarian
Description
Chocolate Chip Brownie Bombs are a delicious and easy-to-make dessert. These bite-sized treats feature a fudgy brownie base, a creamy peanut butter or chocolate spread filling, and a rich chocolate drizzle. Perfect for chocolate lovers and a great addition to any party or gathering.
Ingredients
- 1 box brownie mix
- Ingredients required on the box (eggs, oil, water as listed)
- ½ cup creamy peanut butter or chocolate spread
- ½ cup chocolate chips
- 1 cup milk chocolate chips
- 1 tbsp coconut oil or butter
- Extra chocolate chips, for garnish (optional)
Instructions
- Prepare brownie batter and bake until just set for a fudgy brownie base.
- Scoop brownie pieces and stuff with peanut butter and chocolate chips.
- Roll filled brownies gently into round mounds.
- Melt chocolate chips with coconut oil until smooth.
- Drizzle melted chocolate over brownie bombs and sprinkle extra chips.
Notes
- For a gooier center, slightly underbake the brownies.
- Use a cookie scoop for evenly sized brownie bombs.
- Store in an airtight container for up to 3 days.
- Prep Time: 20 minutes
- Cook Time: 25 minutes
- Category: Dessert
- Method: Baking
- Cuisine: American
Nutrition
- Serving Size: 1 bomb
- Calories: 320
- Sugar: 25g
- Sodium: 150mg
- Fat: 18g
- Saturated Fat: 7g
- Unsaturated Fat: 9g
- Trans Fat: 0g
- Carbohydrates: 35g
- Fiber: 2g
- Protein: 5g
- Cholesterol: 30mg